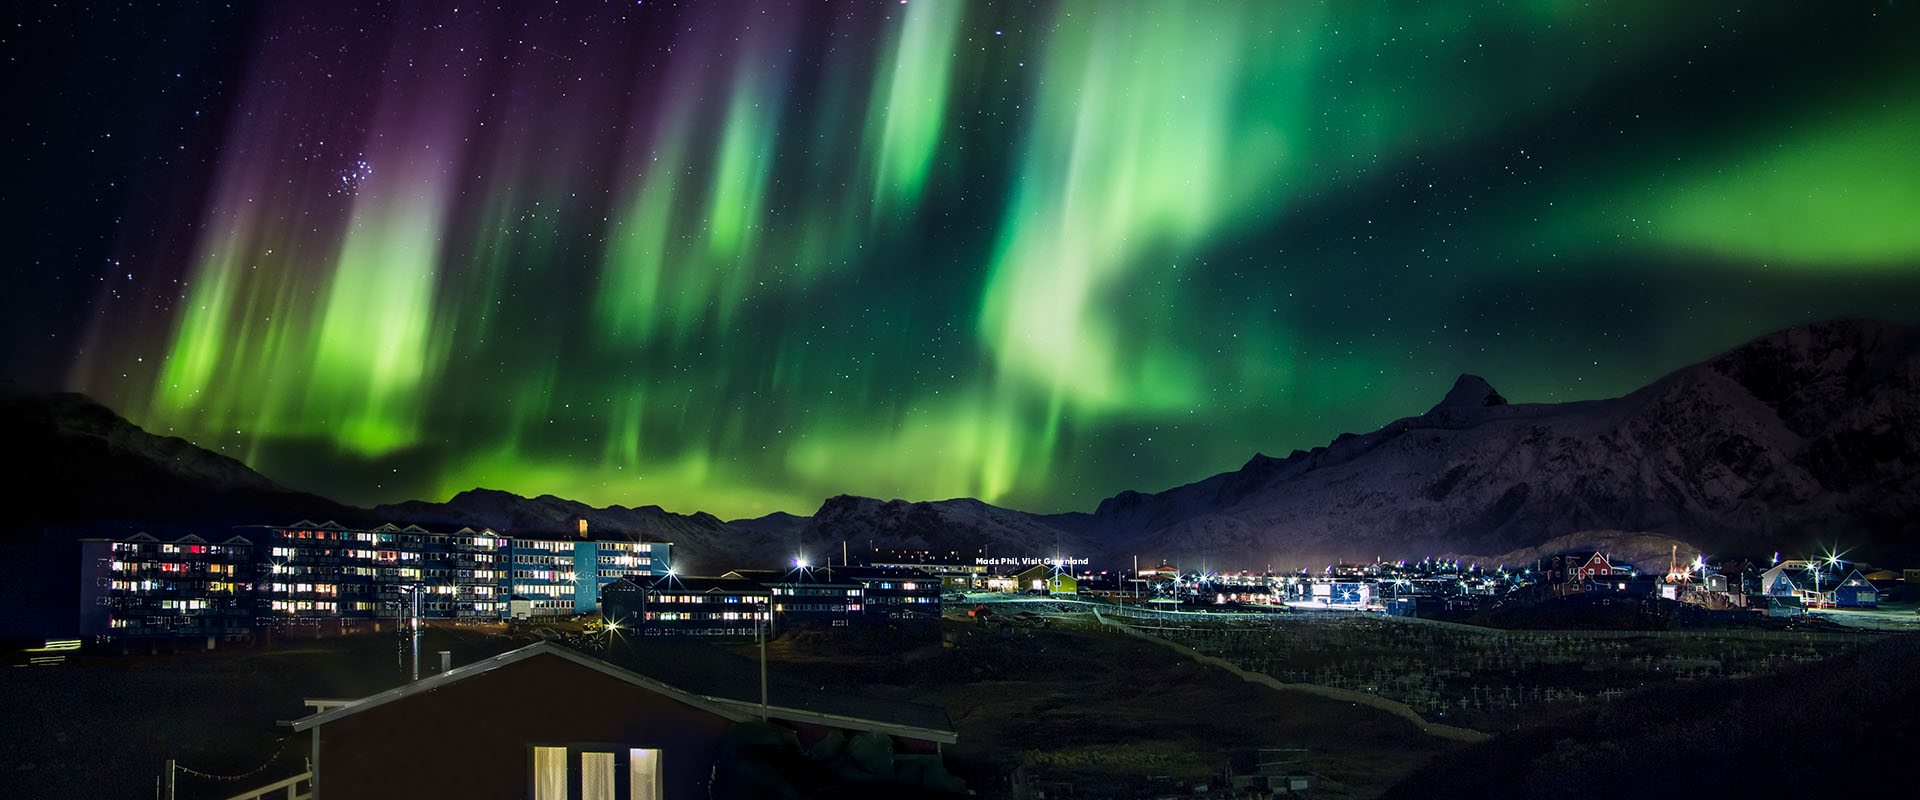
Greenland is one of the best places on Earth to view the Northern Lights. If you’re staying with us at Hotel SØMA, you’re already in a prime location to witness the aurora borealis in its full glory. Whether you’re using your phone or camera, these tips will help you capture the beauty of the lights and make your trip to Greenland truly unforgettable.
1. Find the Perfect Spot Away from Artificial Light
To get the best view of the Northern Lights, choose a location far away from city lights or other artificial light sources. Light pollution can wash out the colors of the aurora, making it difficult to capture the full display on camera. Luckily, Greenland has many wide-open spaces that offer dark, clear skies. Look for elevated areas or places with unobstructed views of the northern horizon to increase your chances of a stunning shot. If you are in a remote area, remember to dress warmly and bring along everything you need to stay comfortable, as you might be outside for hours waiting for the right moment.
2. Understanding the Northern Lights and Their Predictability
The aurora borealis is a natural phenomenon resulting from solar activity. Charged particles from the sun interact with Earth’s magnetic field, creating colorful displays in the sky. However, they are unpredictable. To increase your chances of viewing them, use apps or websites that track aurora activity, such as the NOAA Space Weather Prediction Center or apps like My Aurora Forecast. These apps provide information about the Kp index, which measures geomagnetic activity. The higher the index, the more likely you are to see the lights. Generally, a Kp index of 5 or above is ideal for aurora spotting. Check weather conditions and the lunar phase too—a clear, moonless night provides the best backdrop for the aurora.
3. Capturing the Northern Lights with Your Phone
Using your smartphone to photograph the Northern Lights is easy when you follow a few simple steps:
- Use a Tripod: Even the steadiest of hands can’t hold a phone still during a long exposure. A tripod keeps your phone stable to avoid blurry images.
- Enable Manual Settings: Use your phone’s manual or pro mode to adjust key settings:
- ISO: Increase it to around 800-1600. Higher ISO lets in more light but can also increase noise, so find the right balance.
- Shutter Speed: Set a long exposure time (around 5-15 seconds) to capture the movement and colors of the aurora.
- Download a Camera App: If your phone’s native camera doesn’t allow for manual adjustments, use a third-party app like NightCap Camera or ProCam X, which offers customizable exposure and ISO settings.
- Use Night Mode or Low Light Mode: Many smartphones now come with a night mode specifically designed for low-light situations. This mode can help highlight the aurora’s colors and reduce noise in your images.
4. Capturing the Northern Lights with a Camera
For more advanced photography, a DSLR or mirrorless camera offers greater control and better image quality.
- Use a Wide-Angle Lens with a Fast Aperture: A wide-angle lens (14-24mm) with a large aperture (f/2.8 or lower) is ideal. The wider aperture lets in more light, essential for capturing the aurora.
- Manual Settings for the Perfect Shot:
- ISO: Start with an ISO of 800-3200. This depends on the camera’s ability to handle noise.
- Shutter Speed: An exposure time of 5-20 seconds is usually best. Adjust depending on how quickly the aurora is moving; faster-moving auroras may need a shorter shutter speed to avoid blurring.
- Aperture: Keep your aperture wide open (e.g., f/2.8 or lower) to let in as much light as possible.
- Manual Focus to Infinity: Autofocus often struggles in low-light conditions. Manually set the lens to infinity focus or focus on a distant light source to ensure your image is sharp.
- Bring Extra Batteries: Long exposures and cold weather drain batteries quickly, so pack spares to avoid missing out on a great shot.
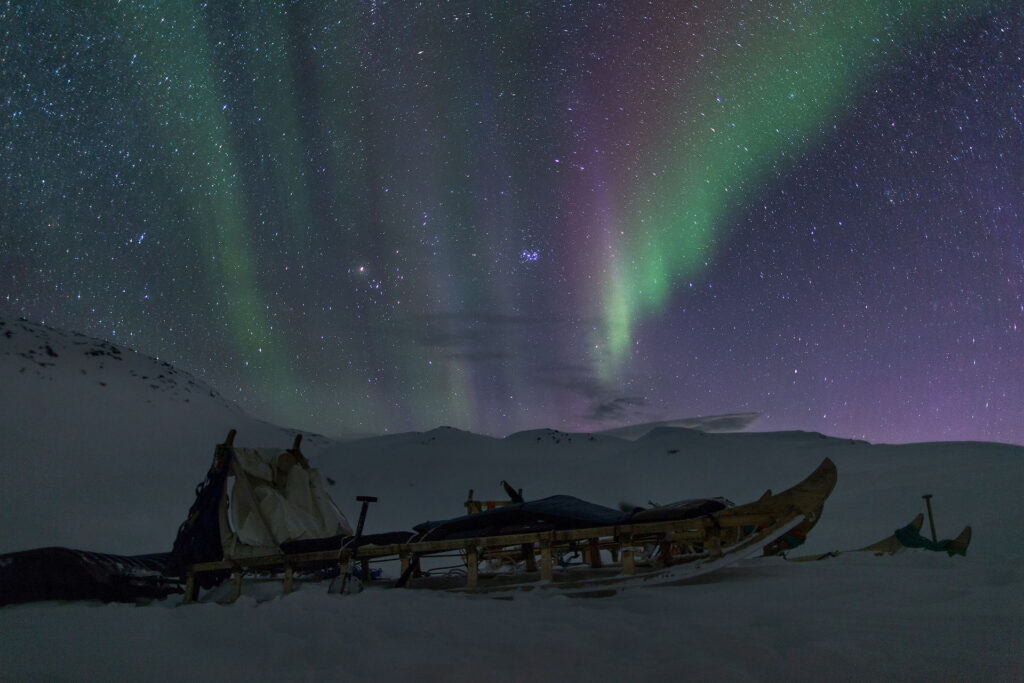
5. Think About the Composition: Aurora as Part of the Image
The aurora borealis is captivating, but the best photos don’t focus solely on the lights. Instead, use the aurora as a dramatic element within your frame. Think about incorporating features like mountains, trees, water, or buildings into your composition. The reflection of the lights on a lake, for instance, can add depth and interest to your photo. Including a foreground element not only provides scale but also gives context to the photo, making it more compelling.
Northern Lights Tours
You can always consider booking one of our northern lights tours. We will show you locations undisturbed by artificial light and take a camera and tripod with us.